Why Choose PlatformIO Instead of Arduino IDE?
If you're working with ESP32 or ESP8266 boards, you might have started with the Arduino IDE. While great for beginners, as your projects grow, you'll need a more powerful environment. That's where Visual Studio Code (VS Code) combined with PlatformIO comes in.

PlatformIO is an open-source ecosystem for embedded development that integrates seamlessly with VS Code. It offers advanced features like intelligent code completion, library management, integrated serial monitor, and built-in terminal—streamlining your development workflow.
PlatformIO vs. Arduino IDE: Feature Comparison
| Feature | PlatformIO + VS Code | Arduino IDE |
|---|---|---|
| Code Completion | Intelligent auto-completion | Limited or none |
| Library Management | Built-in manager (10,000+ libs) | Basic library manager |
| Multi-Board Support | 1,000+ boards supported | Manual board installation |
| Project Management | Professional project structure | Single-file sketches |
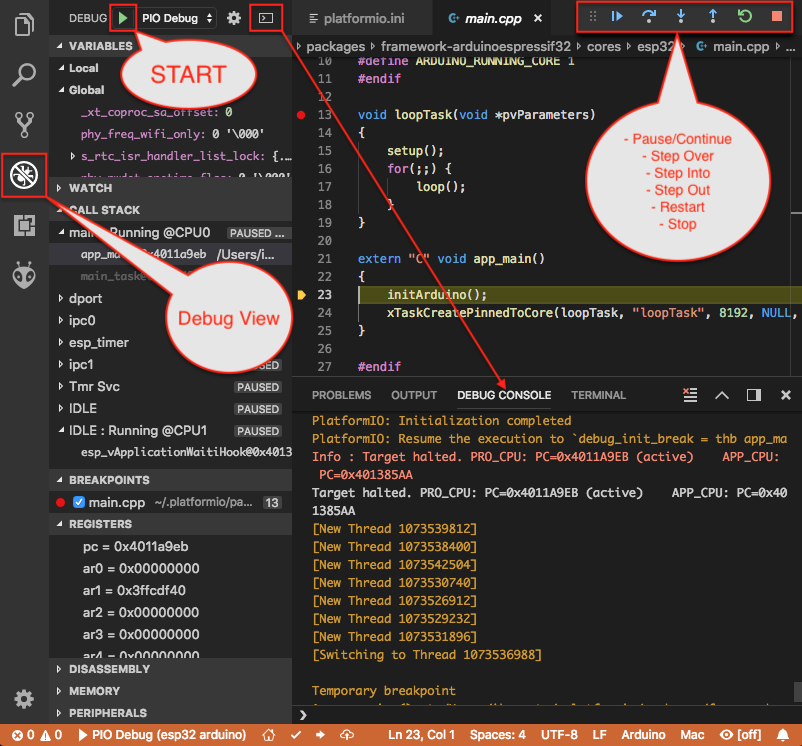
| Debugging | Built-in debugger | Limited debugging |
| Version Control | Git integration | Manual management |
Step-by-Step: Installing VS Code & PlatformIO
1 Install Visual Studio Code
First, download and install Visual Studio Code, a free, open-source code editor available for Windows, macOS, and Linux.
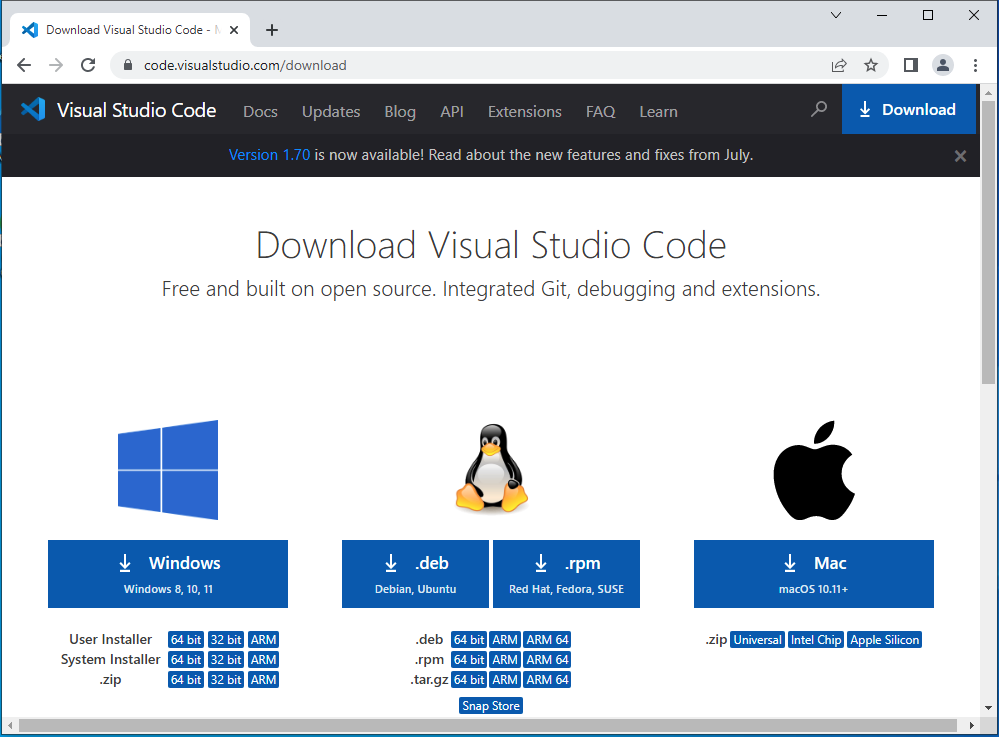
Visit the official VS Code website, download the installer for your operating system, and follow the installation instructions.
2 Install PlatformIO Extension
Open VS Code and navigate to the Extensions view by clicking the Extensions icon in the Activity Bar or pressing Ctrl+Shift+X.
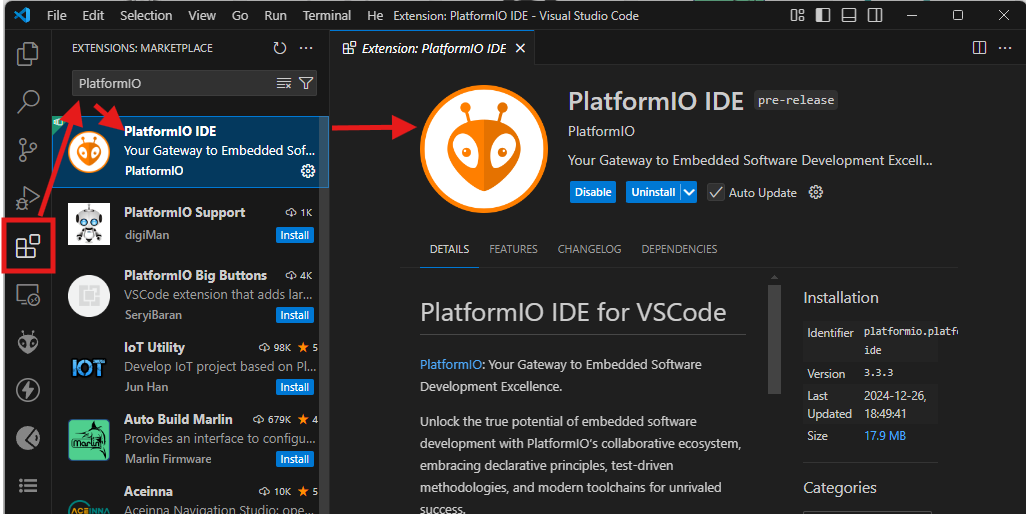
Search for "PlatformIO IDE" and click Install. The installation may take several minutes as PlatformIO downloads its core tools and dependencies.
3 Create Your First Project
Click the PlatformIO icon in the Activity Bar (ant-like logo), then select "Open" and "New Project".
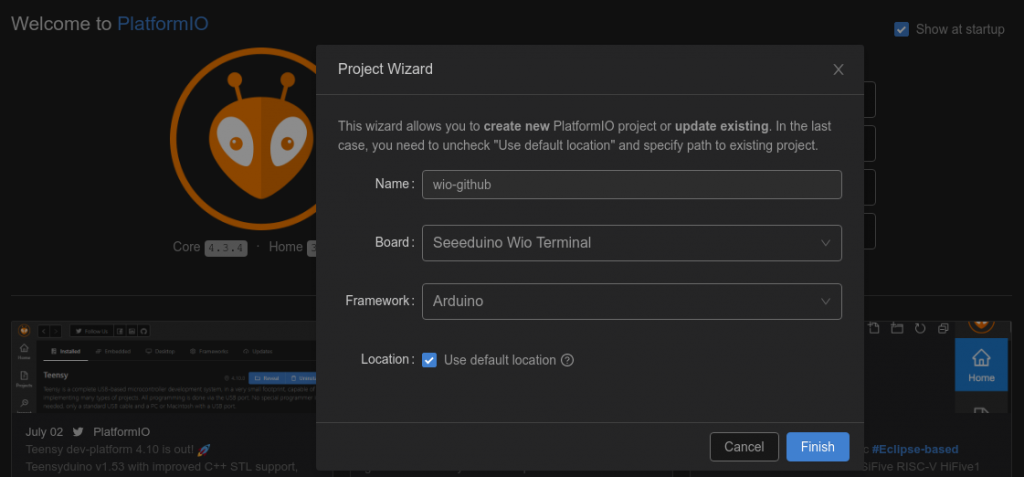
Configure your project:
- Name: Enter a project name (e.g.,
blink_test) - Board: Search and select your ESP32/ESP8266 model
- Framework: Choose Arduino
- Location: Select project save location
Click "Finish" and PlatformIO will set up your project structure.
Understanding the Project Structure
PlatformIO creates a professional project structure with these key components:
                    your-project/
                    ├── include/          # Header files
                    ├── lib/              # Custom libraries
                    ├── src/              # Source code
                    │   └── main.cpp      # Main application file
                    ├── test/             # Unit tests
                    ├── platformio.ini    # Project configuration
                    └── .gitignore        # Git ignore rules
platformio.ini file is the heart of your PlatformIO project. Here you configure board settings, framework options, library dependencies, and build flags.
Your First ESP32 Blink Program
Replace the contents of src/main.cpp with this basic blink example:
                    #include <Arduino.h>

                    void setup() {
                    pinMode(LED_BUILTIN, OUTPUT);
                    }

                    void loop() {
                    digitalWrite(LED_BUILTIN, HIGH);
                    delay(1000);
                    digitalWrite(LED_BUILTIN, LOW);
                    delay(1000);
                    }
4 Configure platformio.ini
Open platformio.ini and ensure it's configured for your board:
                        [env:nodemcu-32s]
                        platform = espressif32
                        board = nodemcu-32s
                        framework = arduino
                        monitor_speed = 115200
                        upload_speed = 921600
For ESP8266 boards, use platform = espressif8266 instead.
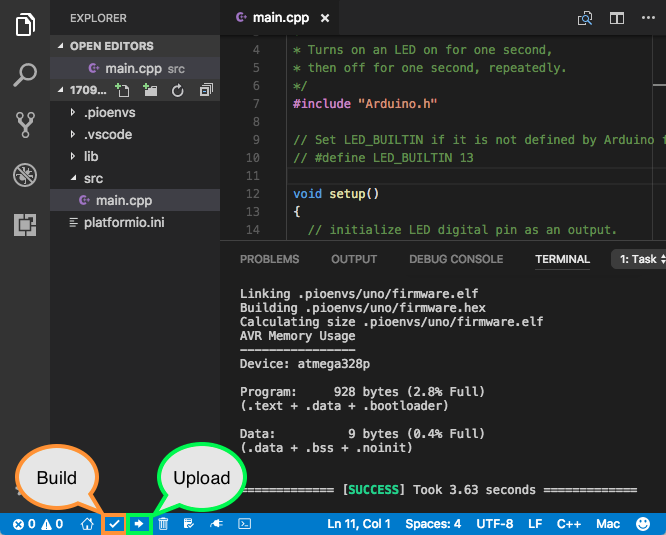
5 Upload to Your Board
Connect your ESP32/ESP8266 via USB, then:
- Click the Upload button (→ arrow) in the bottom toolbar
- Or use the command palette (
Ctrl+Shift+P) and search for "PlatformIO: Upload"
Working with Libraries in PlatformIO
PlatformIO offers superior library management. Add libraries via:
Using the Library Manager:
- Click the PlatformIO icon
- Navigate to Libraries
- Search for a library (e.g.,
PubSubClientfor MQTT) - Click "Add to Project" and select your project
Using platformio.ini:
Add library dependencies directly to your configuration:
                        lib_deps =
                            bblanchon/ArduinoJson@^6.19.4
                            knolleary/PubSubClient@^2.8
                            adafruit/Adafruit Unified Sensor@^1.1.4
PlatformIO will automatically download and manage these libraries.
Essential PlatformIO Commands & Shortcuts
| Action | Shortcut/Command | Description |
|---|---|---|
| Build Project | Ctrl+Alt+B |
Compile without uploading |
| Upload Code | Ctrl+Alt+U |
Build and upload to board |
| Serial Monitor | Ctrl+Alt+S |
Open integrated serial monitor |
| Clean Build | Ctrl+Alt+C |
Remove build artifacts |
| Project Tasks | PlatformIO Home → Projects | Manage multiple projects |
Troubleshooting Common Issues
Upload Failed: Timeout Error
If you see "Failed to connect to ESP32: Timed out waiting for packet header":
- Check USB cable and port
- Install correct USB drivers (CP210x/CH340)
- Press BOOT button during upload
- Check board selection matches your hardware
Library Not Found
If PlatformIO can't find an installed library:
- Run
PlatformIO: Rebuild Library Index - Check library name in
platformio.ini - Verify internet connection
- Try clearing PlatformIO cache
Advanced PlatformIO Features
Once you're comfortable with the basics, explore these powerful PlatformIO capabilities:
- Multiple Environments: Configure different settings for development, testing, and production
- Custom Build Flags: Optimize code size and performance
- Unit Testing: Built-in testing framework for your code
- CI/CD Integration: Automate builds with GitHub Actions
- Remote Development: Code on remote machines or containers
Congratulations! You've successfully set up a professional development environment with VS Code and PlatformIO for ESP32 and ESP8266 projects. This powerful combination will streamline your workflow and unlock advanced development capabilities for your IoT projects.