Why Run Node-RED in the Cloud? Global Access Advantages
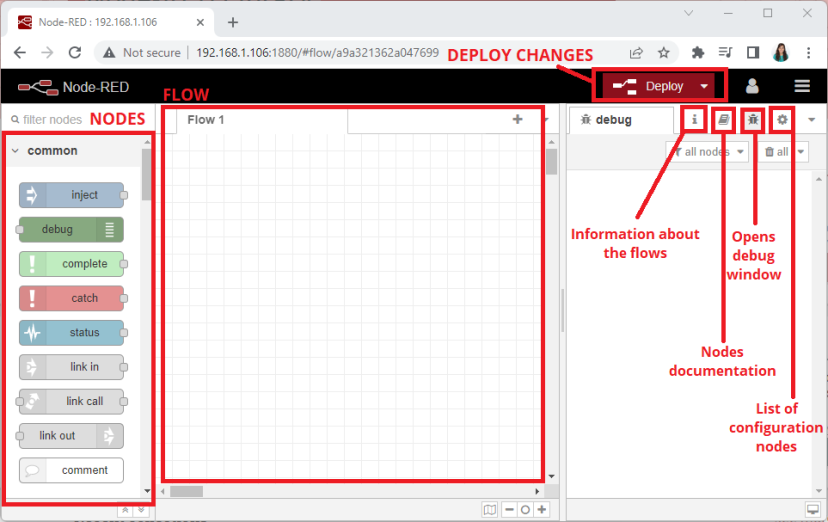
Node-RED is a powerful flow-based programming tool for building Internet of Things (IoT) applications using visual programming. By connecting code blocks (nodes) together, you can create complex automation without writing extensive code. The Node-RED dashboard provides a home automation platform to interact with IoT devices, control outputs, and monitor sensors from anywhere in the world.
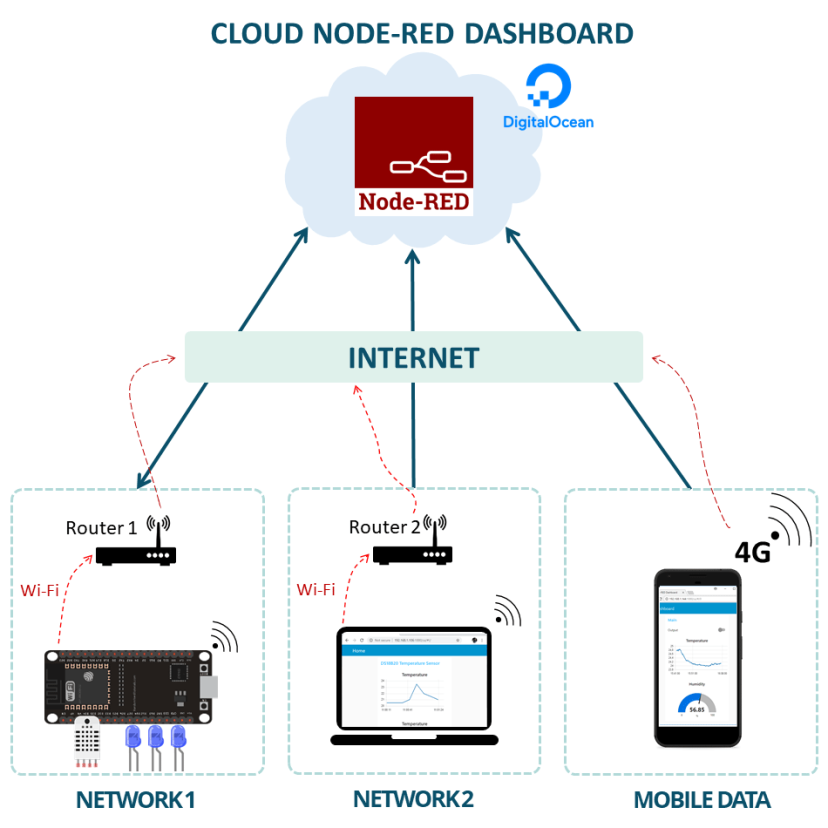
Traditional local Node-RED installations limit you to accessing dashboards only when you're on the same network. By deploying Node-RED to Digital Ocean's cloud infrastructure, you unlock global accessibility that transforms how you interact with IoT devices:
Choosing Your Hosting Service: Why Digital Ocean?
To run your cloud Node-RED installation, you need a hosting service that provides command-line access and software installation capabilities. Digital Ocean offers Ubuntu servers that you can manage through a command line interface, with reliable performance at competitive pricing.
Digital Ocean Benefits
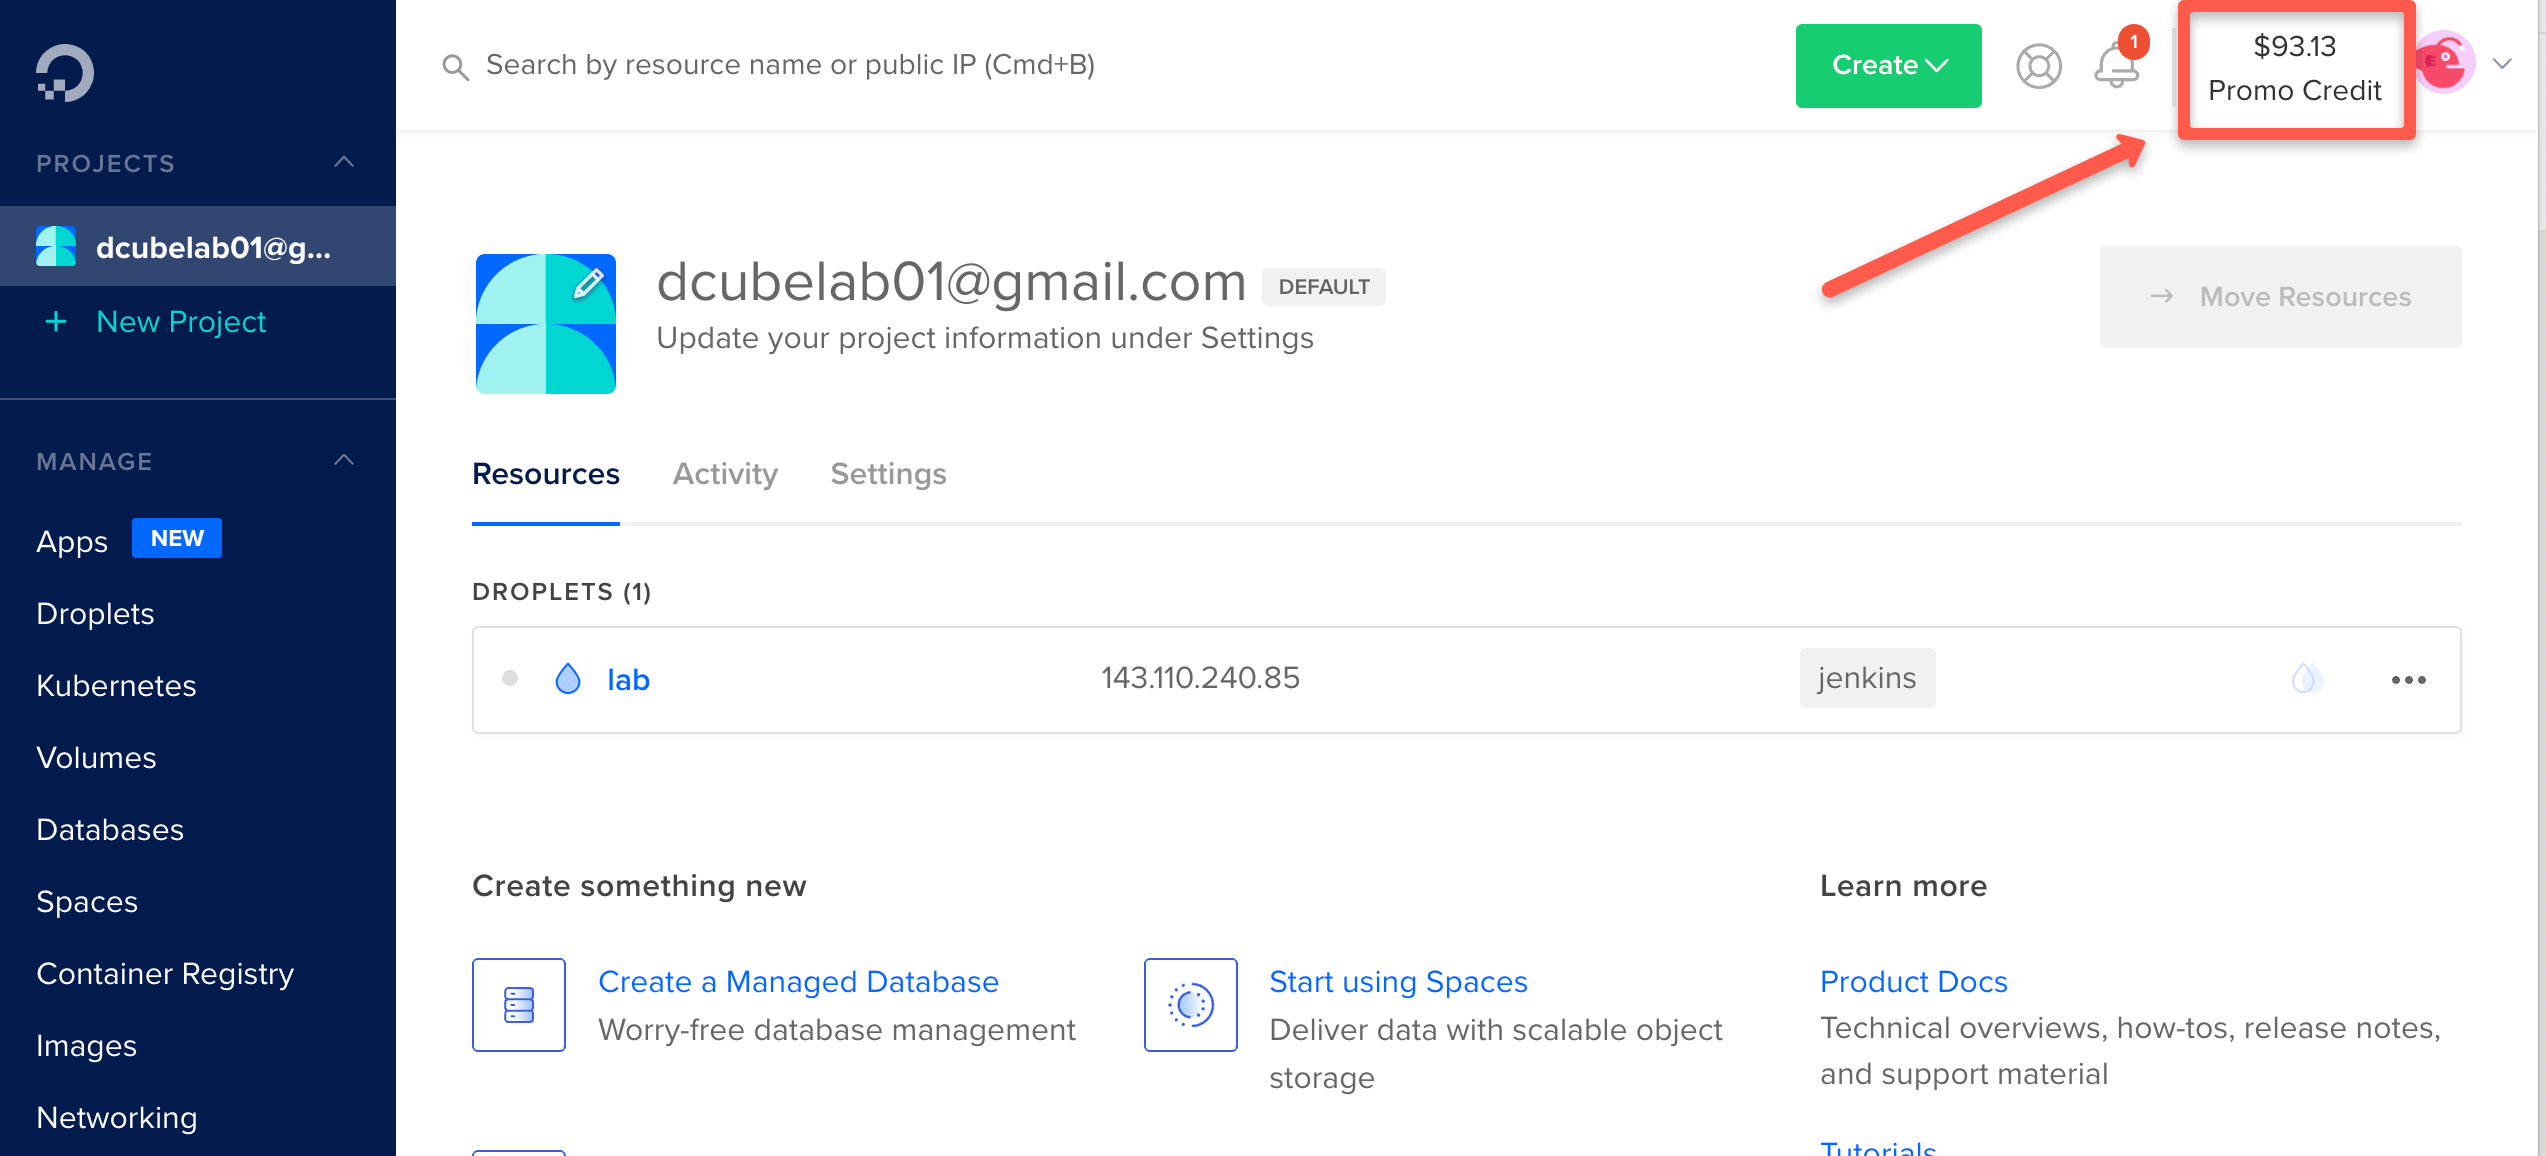
- $100 free credits for 60 days to test the platform
- Simple, intuitive control panel for server management
- Global data center locations for optimal performance
- Extensive documentation and active community support
- Scalable resources starting at just $5/month
Step-by-Step: Creating Your Digital Ocean Account
1 Sign Up Process
Visit the Digital Ocean website and click the "Sign Up" button. Complete the registration using your email address. You'll receive $100 in free credits valid for 60 days to thoroughly test the platform. While you may need to enter payment information, you can cancel anytime before the trial ends without charges.
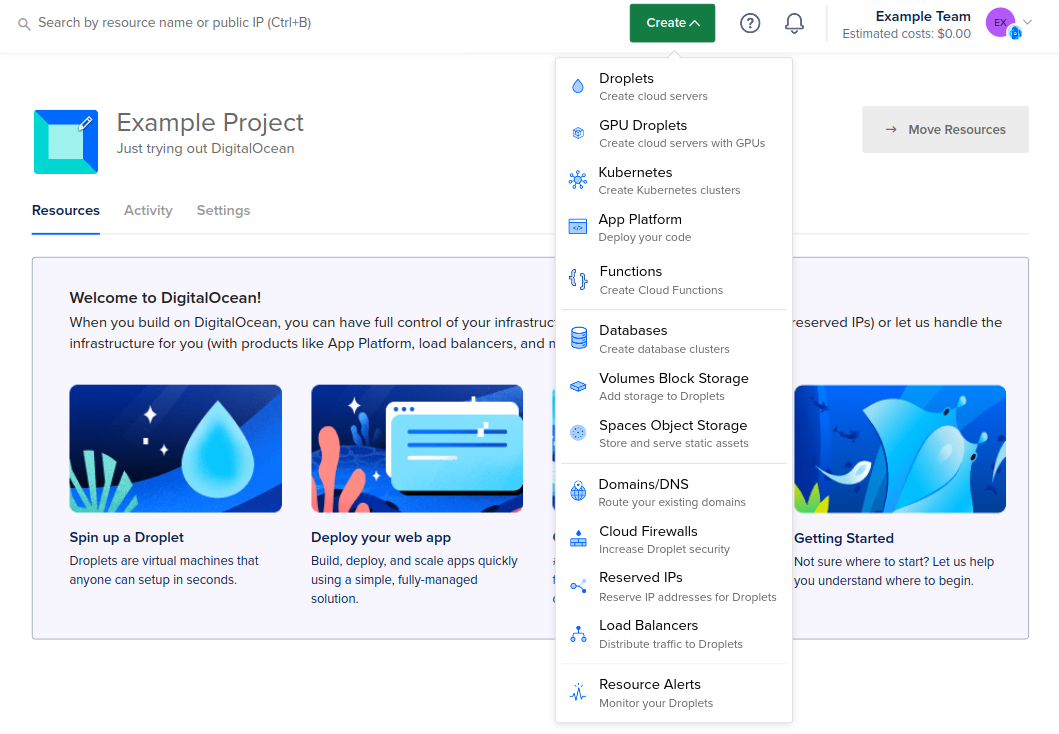
2 Creating Your First Droplet (VM)
Digital Ocean calls its virtual machines "Droplets." Click the "Create" button in the top-right corner and select "Droplets." For this installation, choose:
- Ubuntu 20.04 LTS x64 (tested and recommended)
- Basic plan with the $5/month option (sufficient for Node-RED + MQTT broker)
- Datacenter region closest to your geographical location
- Authentication method: Password (create and save a secure root password)
- Hostname: Descriptive name like "node-red-server" or "iot-cloud-server"
Accessing Your Ubuntu Server Console
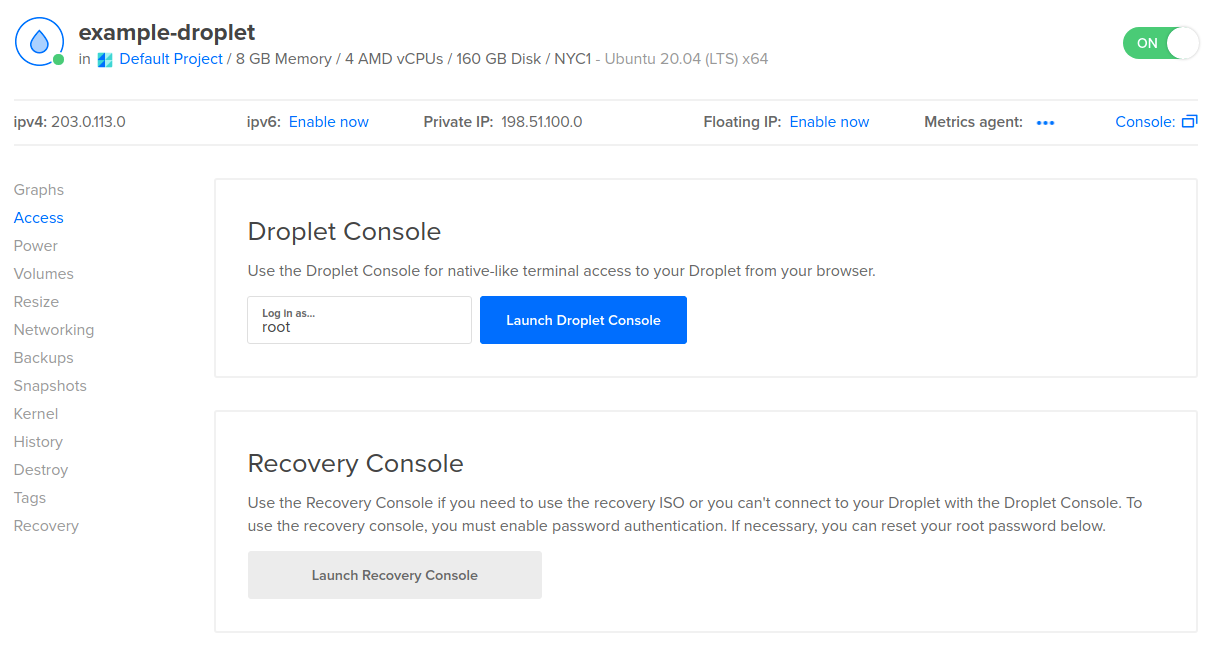
3 Launching the Console
Once your Droplet shows as "Active" in Digital Ocean's control panel:
- Click on your Droplet's name to access its management page
- Navigate to the "Access" section in the left sidebar
- Click the "Launch Console" button to open a browser-based terminal
- Log in with username "root" and the password you created during setup
Installing Node-RED on Ubuntu Server
4 System Preparation
Before installing Node-RED, update your server's package lists and upgrade existing packages:
sudo apt update && sudo apt upgrade -y
This process might take a few minutes depending on available updates. The -y flag automatically confirms prompts during the upgrade.
5 Installing Dependencies
Node-RED requires Node.js and npm (Node Package Manager). Install them with:
sudo apt install npm -y
6 Installing Node-RED
With npm installed, install Node-RED globally:
sudo npm install -g --unsafe-perm node-red
The --unsafe-perm flag is necessary when running npm as root. The installation will take several minutes as it downloads and configures all dependencies.

7 Configuring Firewall
Node-RED defaults to port 1880. Open this port in your server's firewall:
sudo ufw allow 1880
Verify the rule was added successfully by checking that the command output confirms port 1880 is now allowed.
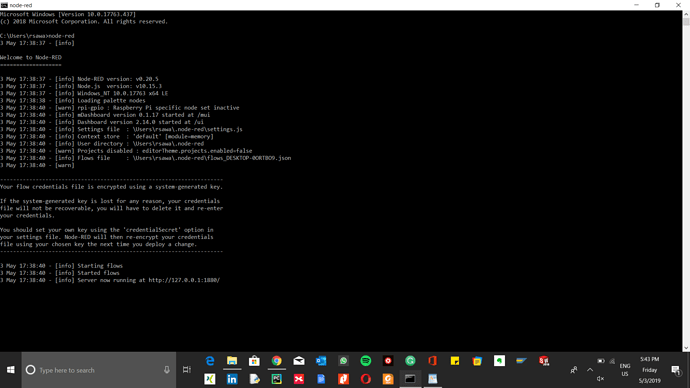
8 Testing Node-RED Installation
Start Node-RED with:
node-red start
Wait 30 seconds for initialization, then access Node-RED in your browser:
http://YOUR_DROPLET_IP_ADDRESS:1880
For example: http://178.62.83.231:1880
Stop Node-RED by pressing Ctrl+C in the console before proceeding to configuration.
Configuring Node-RED as a System Service
9 Creating Service File
For automatic startup on boot, create a systemd service file:
sudo nano /etc/systemd/system/nodered.service
Add the following configuration:
[Unit]
Description=Node-RED
After=syslog.target network.target

[Service]
ExecStart=/usr/local/bin/node-red --max-old-space-size=128 -v
Restart=on-failure
KillSignal=SIGINT

# log output to syslog as 'node-red'
SyslogIdentifier=node-red
StandardOutput=syslog

# if using a root user
WorkingDirectory=/root/
User=root
Group=root

[Install]
WantedBy=multi-user.target
Save the file (Ctrl+X, then Y, then Enter).
10 Enabling and Testing Service
Enable the Node-RED service to start on boot:
sudo systemctl enable nodered.service
Restart your server to test automatic startup:
sudo reboot
Wait 2-3 minutes for reboot, then access your Node-RED interface again. It should load automatically without manual commands.
Securing Your Node-RED Installation
11 Installing Security Tools
Install the node-red-admin tool for password management:
npm install -g --unsafe-perm node-red-admin
12 Generating Password Hash
Create a secure password hash:
node-red-admin hash-pw
You'll be prompted to enter and confirm a password. Choose a strong password and store it securely. The command outputs a hash string—copy this entire string to your clipboard.
13 Configuring Authentication
Open the Node-RED settings file:
sudo nano ~/.node-red/settings.js
Locate the adminAuth section (around line 170-190). Remove comment markers and update with your credentials:
adminAuth: {
    type: "credentials",
    users: [{
        username: "admin",
        password: "$2b$08$bQvFgdNi6as2.JwtDENbP.w/JROldMUhY9o9hXExyjQzw1iFRvC9liF",
        permissions: "*"
    }]
},
Replace the example hash with your generated hash. Save the file and restart your server:
sudo reboot
(Advanced) SSL/TLS Encryption for Production
SSL Prerequisites
- Domain name pointed to Digital Ocean's nameservers
- Nginx web server installed on your Droplet
- Let's Encrypt SSL certificates generated for your domain
- Firewall configured to allow HTTP (80) and HTTPS (443) traffic
14 Nginx Configuration for SSL
Create an Nginx configuration file for your domain:
sudo nano /etc/nginx/sites-enabled/yourdomain.com
Add the following configuration (adjusting domain and certificate paths):
server {
    listen 80;
    listen 443 ssl http2;
    server_name yourdomain.com;
    ssl_certificate /etc/letsencrypt/live/yourdomain.com/fullchain.pem;
    ssl_certificate_key /etc/letsencrypt/live/yourdomain.com/privkey.pem;

    location / {
        if ($scheme = http) {
            return 301 https://$server_name$request_uri;
        }
        proxy_pass http://localhost:1880;
        proxy_set_header Host $host;
        proxy_set_header X-Real-IP $remote_addr;
        proxy_http_version 1.1;
        proxy_set_header Upgrade $http_upgrade;
        proxy_set_header Connection "upgrade";
    }

    location '/.well-known/acme-challenge' {
        root /var/www/html;
    }
}
Reload Nginx and restart your server:
sudo systemctl reload nginx
sudo reboot
Access your Node-RED via your domain (e.g., https://yourdomain.com) for encrypted connections.
Connecting IoT Devices to Cloud Node-RED
With Node-RED running securely in the cloud, connect your IoT devices using multiple communication methods:
Communication Protocols
- MQTT: Ideal for low-bandwidth, high-latency, or unreliable networks
- HTTP Requests: Simple GET/POST requests from devices to Node-RED endpoints
- WebSockets: Real-time bidirectional communication
- TCP/UDP: For specialized device communication requirements
Troubleshooting Common Issues
Node-RED Won't Start
- Check service status:
sudo systemctl status nodered.service - Examine logs:
journalctl -u nodered.service -f - Verify port 1880 is open:
sudo ufw status
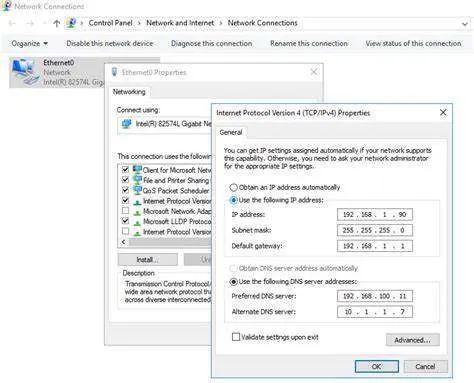
Can't Access Web Interface
- Confirm server IP address is correct
- Check Digital Ocean's firewall rules (separate from UFW)
- Verify Node-RED is running:
ps aux | grep node-red - Ensure your local network isn't blocking port 1880
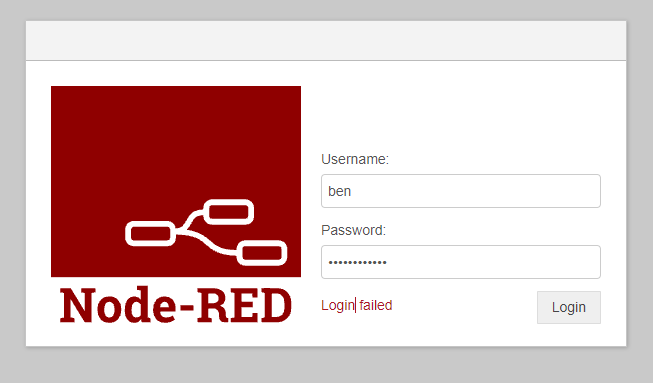
Authentication Problems
- Double-check password hash in settings.js
- Ensure you removed all comment markers properly
- Try regenerating the password hash
- Check file permissions:
ls -la ~/.node-red/settings.js
Extending Your Cloud IoT Platform
Congratulations! You've successfully deployed Node-RED to the cloud with Digital Ocean, implemented security measures, and created a globally accessible IoT dashboard platform. This foundation supports countless projects from home automation to industrial monitoring systems.